Showing posts with label Town Advice. Show all posts

Monday, April 12, 2010

Advice #10 - Exploding a Town[Triangle Program]

To "explode" a town, you have to rapidly expand the happiness line.
Buildings: Tavern-Museum(?)-Town Hall
What you want to do after you complete the GR level's is get the population sky high. To do this, upgrade the tavern twice, then upgrade the town hall.
By filling up the order in the tavern, you can get a lot of happiness, which is a lot of population
The museum, if you have it, will do a lot for you too
the goal of exploding a town is to get a good population; the more population, the more tax payers, the more resource gatherers, the bigger your economy is. It will help that town be more self sufficient later on.

Saturday, March 20, 2010

Advice #7 - Happiness![Town Advice]

Happiness is the essence of the game. Without happiness, you couldn't grow a population, and thus you couldn't do anything. Thus, it is important to know how to get happiness.

Every 50 happiness gives you +1 persons produced per hour. So 200 total net happiness equals 4 people produced every hour. But this number changes. Every 1 citizen produced subtracts from the happiness per hour by 1. That means if you have 132 people, you only get 68 happiness, which is 1.36 growth per hour. Each happiness is worth double it's root number. That means 1 happiness is a growth of .02 per hour. That means 50 happiness equals a growth of 1 per hour. In this section today, we will go through the mechanics of Ikariam Happiness.

There are six sources of happiness normally, and seven sources of happiness for the capital.
(Capital Only) Capital's Bonus: This bonus comes along with being the top city of your empire. You do not get this until you research Well Digging. It's 50 happiness is pretty helpful though; thats a whole extra person you get per hour. So if your population grew 3.22 people per hour, if it was your capital, it would be 4.22 people per hour. When you research Utopia, it goes from 50 to 250 happiness, which is an extra 4 people per hour!

Through Research: There are various technologies that get you more happiness. Holiday and the Economic futures get you happiness bonuses. Holiday gives you 25 extra happiness (+.5 persons per hour) and the Futures start off as +10 happiness, and multiply by the future's level (so a lvl 3 future would be +30 happiness). As Holiday gives you +.5 persons per hour, it can be quite helpful in producing more people.

Basic Bonus: The basic bonus is currently set at 196. This means at the start if your population was theoretically at zero, you would get +3.92 people per hour! But you don't, because it starts at a population of 40 (but don't despair, because it just speeds things up when you have 40 people, more gold, scientists, and wood workers). But because of the 40 population, you have to knock of 40 happiness, so it is at 156 net happiness in the beginning of your town (not counting possible corruption). That means your growth is 3.12 in the beginning. This basic bonus though is essential to your early game growth, and should give you a big enough wave to ride in your first town until you get taverns.

Tavern: The Tavern is the foundation of your happiness production. Cheap, self supporting, and the first happiness building you get, it is the staple building of your town, if you ever want it to grow. Each Tavern level gets you +12 happiness, or +.24 people per hour. In the tavern, happiness is not based on how much wine you produce, but what interval you produce it at. Each interval produces 60 happiness. That means each level to it's max gives you +72 happiness. If your town consumes 8 wine then, then your town will produce +120 happiness, or +2.4 people per hour, +24 happiness, so an additional +.48 people per hour, a total of 2.88 growth per hour. Hopefully you can see that the Tavern is extremely important to your town.
Hint: It is wise to keep a fairly large sum of wine in your towns, like 5,000. (That was two sources, the building itself, and the wine consumed)

Museum: Unlike the Tavern, each museum level gives you +20 happiness. Each level gives you space for one cultural exchange, and you sign a treaty with someone, and you get a Cultural Asset Treaty, a CAT, or simplified to Cultural Treaty, or CT;Both are used. Anyways, each CT gives you + 70 happiness. That means each level to its max gives you +90 happiness. That's pretty good, but this is of course because they are so expensive. So a level 3 Museum to it's best gives you +270 happiness, or +5.4 growth! Now hopefully your convinced to build both the Tavern and Museum! Also, the Museum relieves a lot of pressure from the wine producing cities, as wine is in less demand. (That was two sources, the building itself, and the CT's)

Negative Effects: Corruption and Population have a negative effect on happiness.

Don't worry about corruption so much though, as it is just there when your GR level isn't to the amount of colonies you have (three colonies = Level 3 GR). Corruption is calculated as a number that is a little less than all of your happiness factors multiplied by the decimal form of the percentage of your corruption. Sounds complicated? Not really. Say you have a total of 200 happiness, and 15% corruption. You would move the decimal left two points, so it is now ".15". You multiply 200 by .15, and viola, you get your number, 30. This number is subtracted from your entire happiness total, so your net happiness would be 170 happiness. Whenever you calculate corruption though, the happiness reduction is a little more "user friendly", so it would probably be -28 or -29 happiness.

Population reduces happiness for every citizen you have. That means 200 citizens (as explained earlier) deduct 200 happiness from the town. Simple as that.

So let's do a problem here. 196 basic bonus, 25 research happiness, 24 tavern building bonus, 120 wine bonus, 20 museum building bonus, 70 CT bonus. -232 of population, and there is no 10% corruption.
24+120+25+196+20+70 = 455
.1 x 455 = 45.5, round down to (user friendlyness) 44.
-232 happiness from population, so 232 +44 = 276
455-276 = 179 happiness (growth of 3.58 persons per hour)

Now that you know the math behind the Happiness, take advantage of it!

Monday, March 8, 2010

Advice #1 - Power Colony! [Town Advice]

What is the goal of each colony? To contribute to your confederation of city states, or empire, kingdom, whatever you feel like calling it. Now in Ikariam, everything is important. Every building is important.
In my plans, I organize things into 4 major sections. I knock off each systematically, after reaching a building level goal of, for example, level 15 carpenter, I move onto the next goal.
1. Primary goal : Carpenter/Architect building
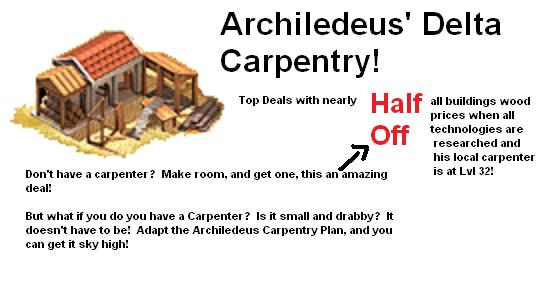
why? Because they cut prices down. A lvl 32 carpenter and architect office with all building cutting upgrades will add up to a total of 46% off! Don't you go to buy things when it's got that kind of deal! These two buildings save you boatloads!
Secondary goal: Tavern - this always remains a secondary goal in my books because with it you get more population, and with more population, you can get more workers, and more money. Each non-working citizen pays 3 gold per hour in taxes. Always upgrade taverns whenever your people are neutral.

2. Primary goal: Luxury Buildings and Forester
why? Because they give you bonus resources! That means more resources to fill in a smaller hole (hole being cost, the architect/carpenter cut that cost, making a smaller hole, :P) Yes, you are now on the road of efficient expenses, resource management, and ohh, the joy of getting things done faster and cleaner!
Secondary goal: If your carpenter/architect office are still fairly cheap, still nail at them if you don't have enough resources for a lux+ building, but enough for these guys, and you are going somewhere, or just leaving for an extended period of time. Also, go at those taverns!
3. Primary goal: Taverns
Why? As I explained earlier, they maintain your happiness. Try to get them sky high, but make sure your wine consumption isn't ridiculously high, or else you'll get that sudden "drowziness"given by energy drinks that Five Hour Energy people always proclaim. But if you are riding a wave of growth of 4 people per hour, your economy will skyrocket! More gold, workers, resources, cheaper buildings, we're on a roll!
Secondary goal: Pretty much anything that's cheap. It's a free for all here.
4. Primary Goal: Academies and Hideouts: Technology is important, and you gotta seal the deal with great spy protection. Always try to employ as much scientists as possible at once. Do note though, that they cost six upkeep and don't pay taxes, a total of -9 gold per hour on your economy. Hideouts are extremely important in making sure people don't figure out stuff. Make sure all of your towns are on top of things though, because there are two major universal things that can bite your butt if you don't have a hideout there: online status and messaging types and messaging partners. If they do it enough, they can trace patterns, figure out your partners, and even figure out your position outline just by these things. Very important to nail everything down completely.
Secondary Goal: Anything that works

Always throw in town upgrades, etc. in there, but don't build the temple. Please, it has no point but to give you a cruddy bonus if you can get all of your island mates (which they won't) to participate. Not worth the time or resources.
Also remember to keep your GR's up to date, or else the corruption will really be a thorn in your side.

You will hopefully have this down: Cheap buildings, good income (both gold and resources) because of high population, good spy protection, and high technological levels.

That's just Advice #1!